Remedial Membranes Clear Waterproofing Membranes can be used on both Internal and External Tiles. When applied to gloss tiles it is very difficult to see where the membrane has been applied to, but when applied to matt finish tiles it brings out the colour in the tile a little more like a wet look. If you are interested in getting a sample application performed, contact us on info@remedialmembranes.com.au
“For my requirements of waterproofing a 1stFloor Balcony over FC sheeting on timber joists, I highly recommend Remedial Membranes and their product, from the time of requesting the initial inspection, quote preparation, commencement and installation.
They were very understanding of my requirements throughout the work and communicated their plan of operations daily in advance.
‘Clear Waterproofing Membrane’ is a great product over the targeted surfaces with no disturbance and minimal preparation to surfaces beneath.
I am now considering their membrane application to my shower areas as a safeguard.”
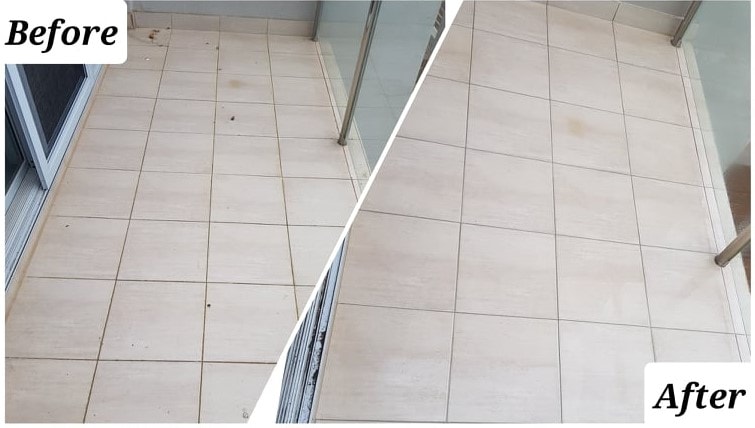
“We had our 35m2 patio with ceramic tiles waterproofed using a satin finish of the Remedial Membranes, Clear Waterproofing Membrane and so far very pleased with the result and orientation is facing the salt water and pleased to find a solution to meet our needs without the need to remove the tiles.
The staff are very friendly and knowledgable.
10 out of 10 for great communication skills, Jasmin always called and returned calls promptly. Thanks Jasmin”
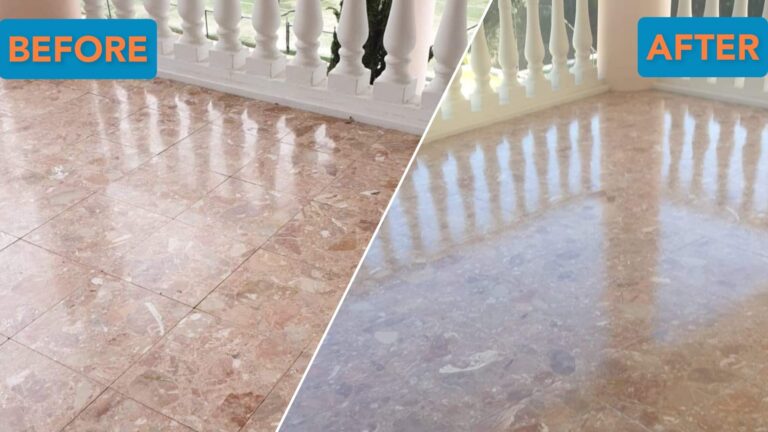
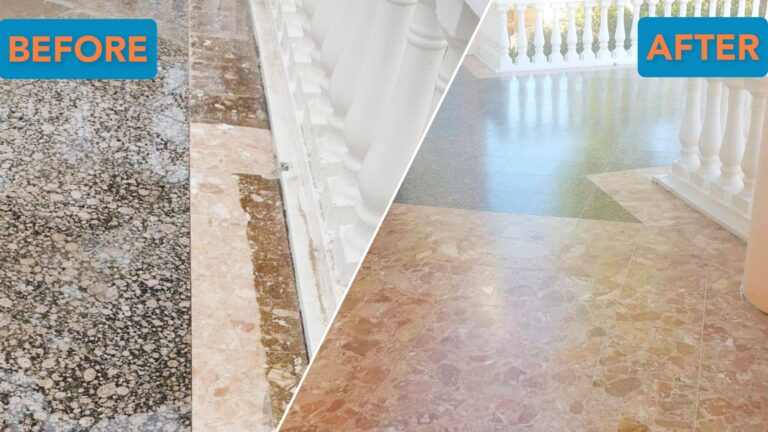
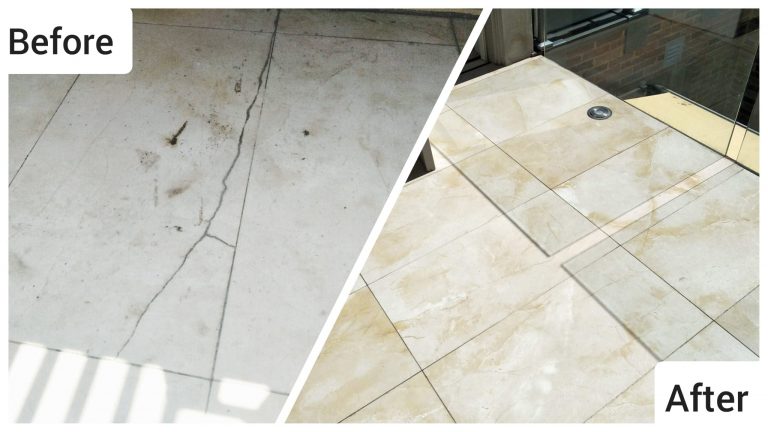
This was a 30m2 balcony with marble tiles on concrete substrate. The client reported a leakage downstairs in his garage. The issue was caused by porous tiles, leaking feature lights and water leaking through the edging of the balcony. With a bit of a repair to the lights and a reseal, the leaky balcony has been fixed!
This was a 6m2 upstairs balcony with timber construction. The balcony was completely refurbished only 2 years ago. The client started noticing white efflorescence coming through the grout. There were 2 loose tiles and all the edges were leaking through. Cleaned, sealed and paint on membrane applied, now the balcony is fully waterproofed.
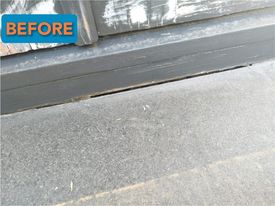
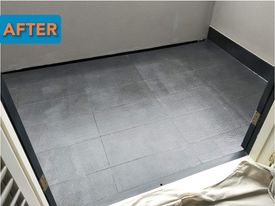
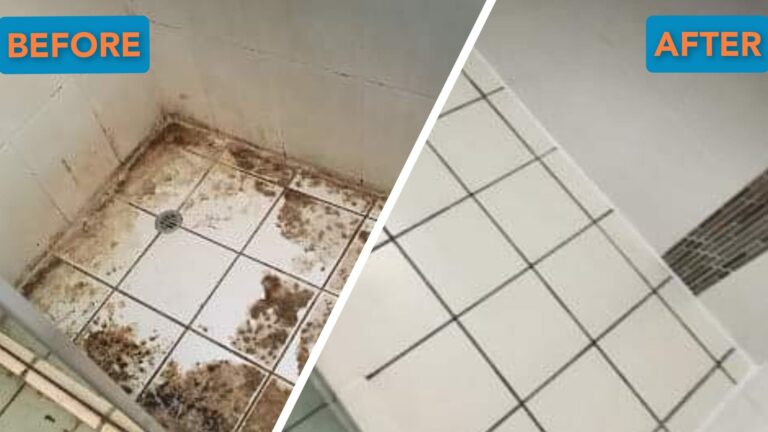
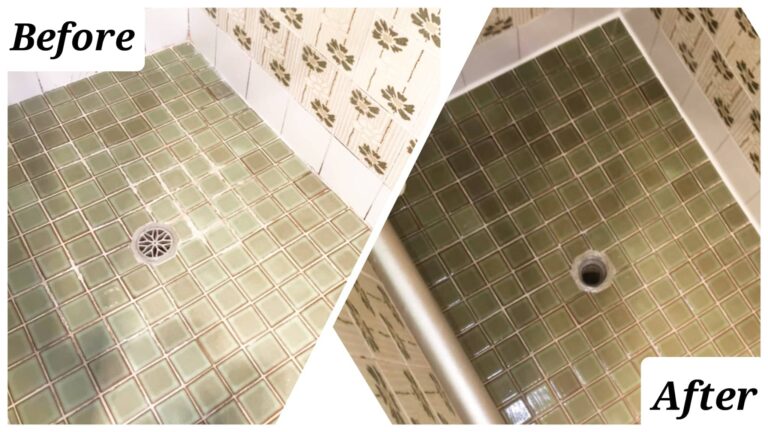
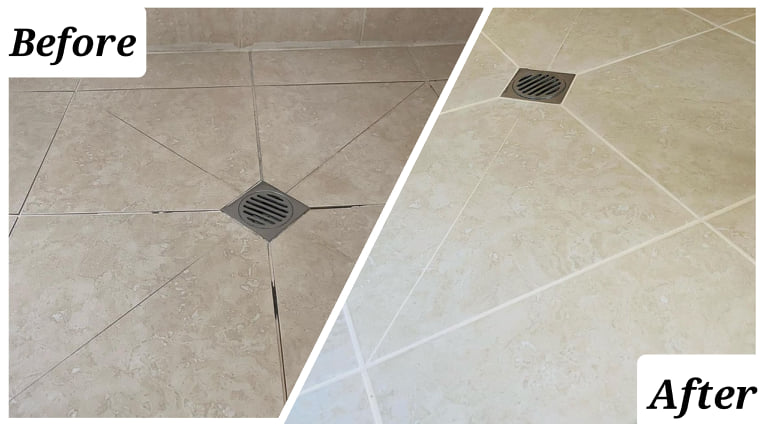
A 900×1200 tiled shower base in an upstairs bathroom with timber construction floor was leaking through the ceiling into the downstairs kitchen. The owners had previously attempted to get it repaired, but it was unsuccessful. Now no more leaks!
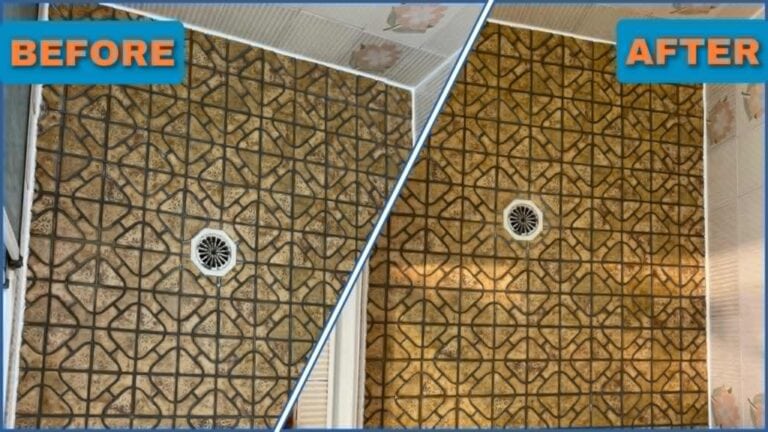
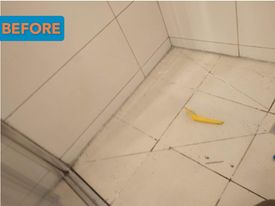
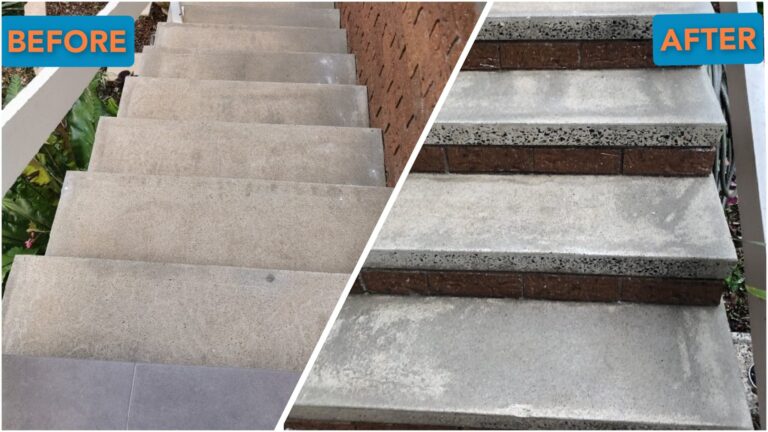
Some jobs we come across are in massive disrepair. This job was one of them. Source: Roland Accredited Installer
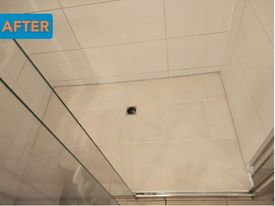
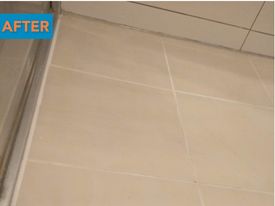
Brisbane Shower After
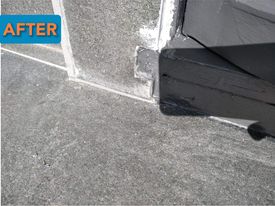
Prior to the membrane application, we need to make sure we have a solid sub-straight. Here you can see a lot of preparation was necessary to get this job done successfully. Source: Roland Accredited Installer (Brisbane)
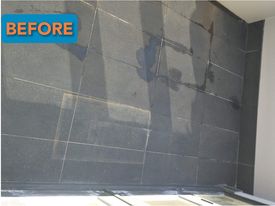
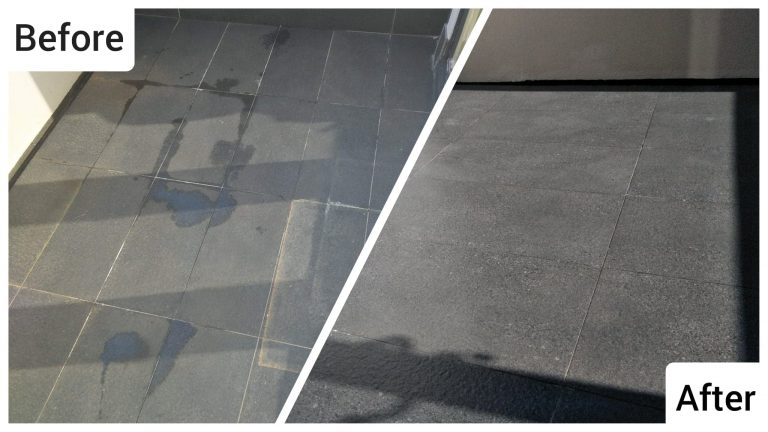
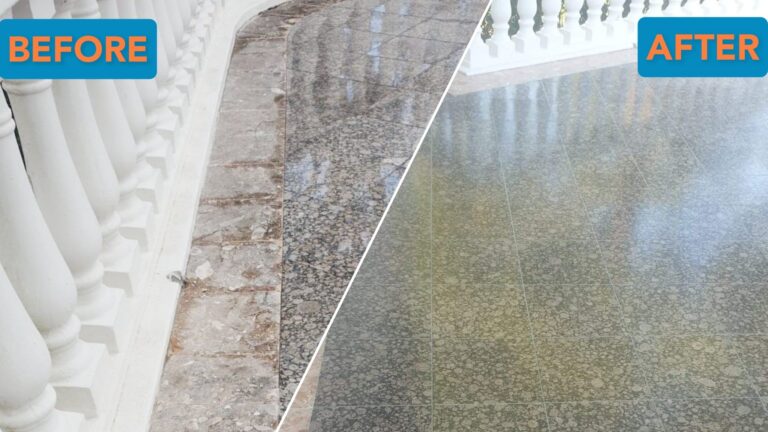
Melbourne Bluestone Balcony Before
Leaky Blue stone Balconies are common in Melbourne.
Melbourne Bluestone Balcony After
Blue stone comes up beautifully with Clear Waterproofing Membrane, it seems to revitalize it. The installation is a little different from the usual process. We needed to apply the first coat of membrane prior to doing any joint adhesive work, then paint on the second coat. Although both materials are clear, they react differently to the stone.
Waterproofed Wallpaper for Ice Creamery
The client wanted to have easy to clean wall paper for their backdrop. The Clear Waterproofing Membrane enabled them to choose whatever their hearts desired. Source: Tu Projects
Waterproofed Wallpaper Ice Creamery
Want to have limitless design possibilities? Clear Waterproofing Membrane over wallpaper provides that, making it waterproofing and easy to clean. Source: Tu Projects
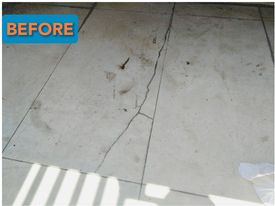
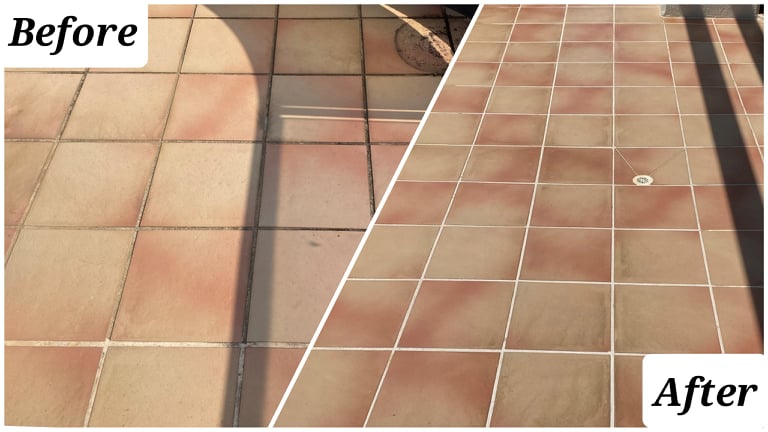
Narrabeen Balcony Before
Terracotta tiles are beautiful and timeless, hence the owners wanted to keep them but needed the leaks to stop. They called Dean from Abbott Bros (Accredited Installer) to see what could be done.
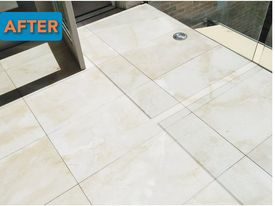
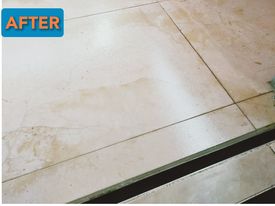
Narrabeen Balcony After
Beautifully finished once cured, the owners will replace their furniture and continuing enjoying this area when very little inconvenience. Due to the heat, a tarp was erected to ensure there were no issues with applying the membrane.
Waterproofed Pine Vanity
The client had a natural stone bathroom and wanted to use natural materials. A custom pine vanity was constructed, and Clear Waterproofing Membrane used to protect the material and the finish
White washed Bath Return
Don’t want tiles everywhere? Now you don’t have to. Use whitewashed pine waterproofed with Clear Waterproofing Membrane on your bath return to create a feature in your bathroom.
By Design Projects – Before
By Design Projects was tasked to provide a polished concrete finish in their small bathroom. How did By Design Projects raise to the challenge? They used FC sheeting adhered to the existing walls, waterproofed with Clear Waterproofing Membrane.
By Design Projects – After
This image speaks for itself! By using Clear Waterproofing Membrane on the FC sheeting, they were able to create a polished concrete look to fulfil the customer’s dreams. And they managed to update the bathroom using a relatively inexpensive process.
By Design Projects After 2
Clear Waterproofing Membrane is a waterproofing membrane, that meets the Australia Standard requirements for a water-resistant finish. When applied over sub straights, it creates a water tight finish and removes the limitations on designs that existed before.
Burwood Hotel Before
Burwood Hotel’s open courtyard was leaking and in need of repairs. But due to circumstances, it was inconvenient to rip up and replace, so Clear Waterproofing Membrane was installed…. Check out the after image.
Burwood Hotel After
Burwood Hotel’s courtyard after Clear Waterproofing Membrane was applied.
Single Sheet Wallpaper -Waterproofed
Single Sheet Wallpaper with waterproofing on the left and untreated for comparison on the right.
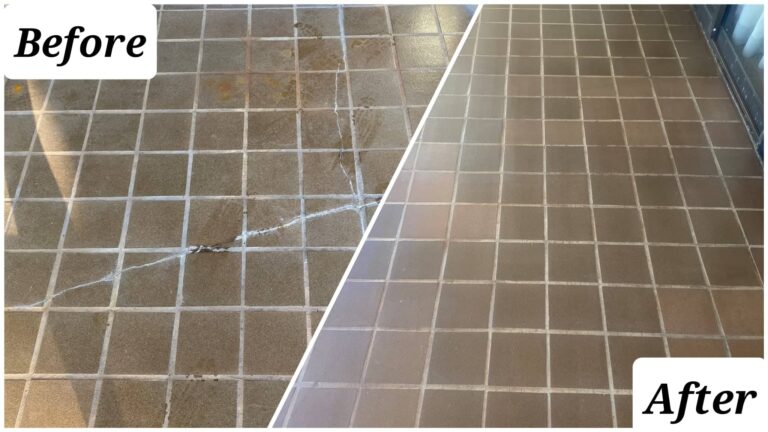
Terracotta Balcony Before
This Terracotta Balcony was leaking from no divisible location and causing damage below. The solution: Clear waterproof the entire area.
Terracotta Balcony After
By applying the Clear Waterproofing Membrane over the leaky balcony, we were able to fix the leaks, even though the source was never found.
Unhoned Travatine
Sample of Clear Waterproofing Membrane on unhoned travertine, visible in the right-hand corner.
Contoured Wallpaper Waterproofed
Contoured Wallpaper with waterproofing on the left and untreated for comparison on the right. If you look closely, you will notice that none of the sparkles have been dulled after waterproofing was applied. They are as luminous as ever!
Contoured Wallpaper Waterproofed
Contoured Wallpaper with waterproofing on the left and untreated for comparison on the right.
Villaboard Sample
Clear Waterproofing Membrane in the bottom left-hand corner.
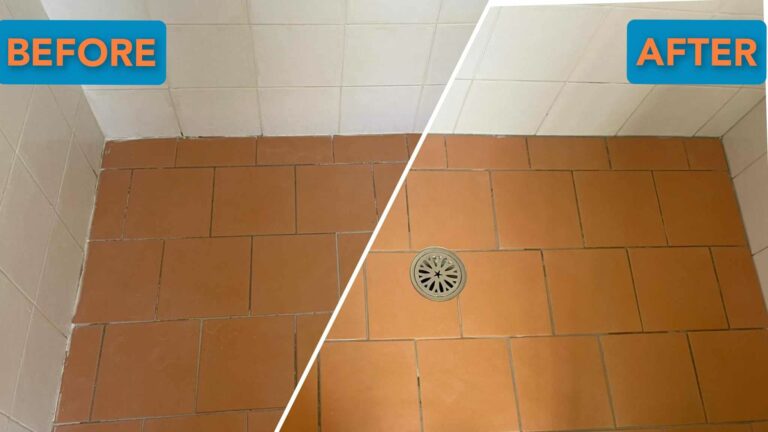
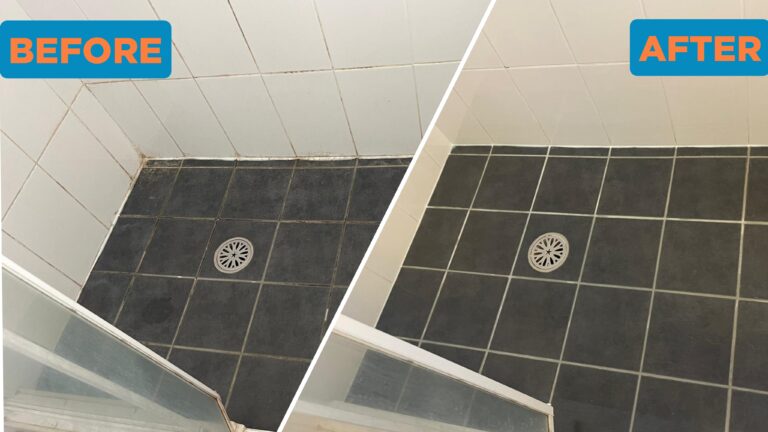
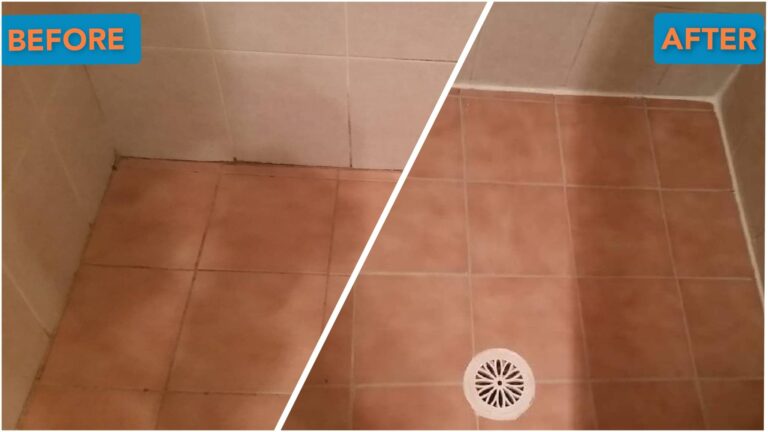
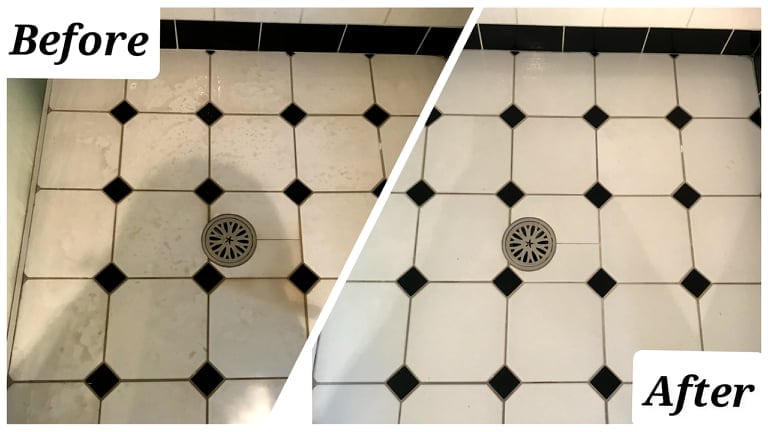
New Application Before
New Shower before waterproofing.
New Application After
New Shower after Clear Waterproofing Membrane was applied.
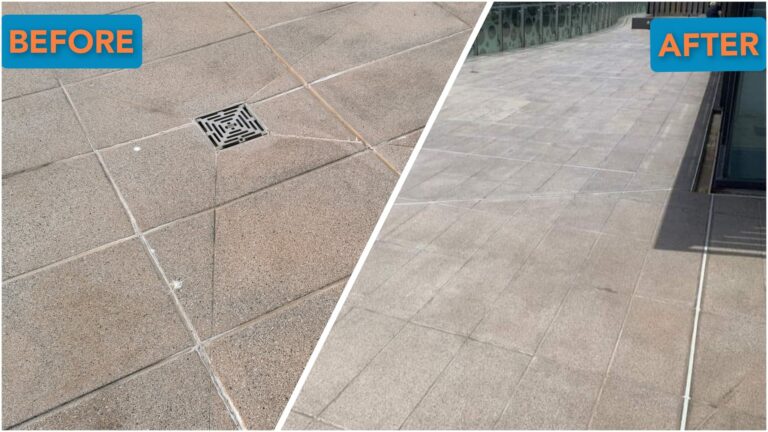
External Tile Matt Finish
External Tile with matt finish, RM External only applied to the centre of the tile.
Internal Gloss Tile
Internal Gloss Tile with RM Internal applied to right-hand side only.
Paintable Wallpaper Closeup
Paintable Wallpaper with waterproofing on the left and untreated for comparison on the right.
Paintable Wallpaper Waterproofed
Paintable Wallpaper with waterproofing on the left and untreated for comparison on the right.