People often consider the condition of their bathroom as one of the factors to consider when choosing the kind of repair service to employ. Homeowners who may have older bathrooms often choose a short-term solution to remedy their leaky shower. People might not want to make the decision to carry out a lengthy repair on their leaking shower. This might be because they know they are going to have to completely remodel their bathroom very soon. For the time being, they only want to patch up the leak in order to forestall any more structural issues.
On the other hand, house owners may look for a solution that is more long-lasting for their leaking shower. And besides, they just had their home constructed, so it seems to sense that they ought to put off any expensive renovations for as long as possible. They will be able to circumvent structural deterioration, stains on a ceiling located underneath a bathroom, or mould growth in the carpet if they perform a permanent remedy.
What are the Root Causes of a Leaking Shower?
The shifting of the house is the cause of more than ninety percent of leaking shower problems. Your shower may spring a leak for a number of other reasons, including, but not limited to:
- Under tiles Shower waterproofing solution that is not not suitable
- There is currently no product that waterproofs your shower already installed
- The appropriate waterproofing product, however, was ruined when floor tiles or other trades were working over the waterproofing membrane.
- The appropriate product for waterproofing, however, was put improperly or placed in the incorrect place
The problems described above are some of the potential causes of issues that arose when the waterproofing was being installed. These problems are instantly apparent to the observer. On the other hand, if you notice that your shower is leaking after about two years have passed after it was built, then it is possible that your waterproofing layer has already developed some issues and fractures. The external environment especially with regular extreme weather events of flood/drought that occur are often the source of the movement which creates cracks or failures.
Sometimes builders will decrease the spacing of the framing in an effort to reduce movement that is seen in a building to prevent leaks. Buildings might also be built to withstand earthquakes. The shower floor is still constructed with the same materials. Cement sheet is installed over the top of frame applications. Followed by waterproofing then sand and cement screeds or beds. These materials are used to ensure that fall is created for water to drain away without ponding but also to ensure that when they get wet that the materials themselves will not necessarily break down immediately. Past building practice was to use Chip Board not cement sheeting below the screed but once wet it would swell damaging the shower floor and requiring complete rectification.
Although this method does assist is the level of damage and deterioration that occurs when water leaks it does not prevent movement. As building practice is changing to accommodate the inevitable issues of leaky shower floors other things should also be considered like how to rectify these areas without major strain on the homeowner. All the materials above the framing will not be negatively impacted with water leaky but the materials below will. Unfortunately, the waterproofing membrane is out of reach for repair as current code states that internal areas require an under substrate waterproofing membrane. So although this is a current requirement when we come to repairing the waterproofing membrane without removing tiles the only option is to install a clear traffic-resistant waterproofing membrane over the tiles to waterproof the leaking shower.
Another circumstance that might raise the likelihood of your shower leaking is the decision of which tiles to install in your shower. This can make the problem much worse. Stone tiles exhibit the characteristics of hard sponges meaning that they can soak up a significant quantity of water, store it continually until a movement crack appears. Because it attracts and retains moisture, some of the water will be prevented from going down the drain. Because of this, the likelihood of leakage increases and the severity of water damage can also be increased.
In addition, lightweight construction which typically looks like timber, steel or a combination of the two is likely the single most significant factor that contributes to your leaking shower. Wood frames, along with other frameworks are built to move. They behave differently to a poured concrete slab. Cost and speed usually determine the choice of building materials that are not seen by the eye.
Prolonged rainfall or flooding greatly soften the earth more than just the surface. It can soften the earth past the foundation and can also raise the water table substantially. The weight of the house is held in the foundations when the earth is soft. Alternatively, when the excess water dries out of the ground and long periods of time occur without rainfall this further impacts changes around the foundations. These movements can be absorbed in the frame which makes them initially appealing but solid surfaces like screeds will crack and with direct fixed waterproofing being applied to either the top of the screed or the top of the cement sheeting these will be torn with the movement.
Ever since the beginning of time, insurance firms have been advising prospective homeowners to maintain an eye out for faulty structures for the causes that were just discussed. The below is a prime example that was recommended by a homeowner’s insurance company.
There was a problem with the waterproofing of the shower inside a house that was constructed more than 5 years ago. The total cost to restore the damage because there had been an argument about liability was over two hundred thousand dollars, which is nearly as much as the price to construct the structure in the first place!
In addition, there is absolutely no reason for property owners or building contractors to get into a quarrel about the likely reasons for a shower leaking and whose responsibility it is. Due to climate change we are entering periods of time that neither party will be responsible for the failures caused by movement. After all, dragging the issue through the court system can be a time-consuming and expensive endeavour for both of the people involved. But the biggest cost of all is the stress it causes for everybody involved.
The easiest path to take now is simply to repair your own leaking shower. We have included a step-by-step tutorial below regarding how you can repair a shower that is leaking.
What You Can Do To Fix A Leaking Shower
However, how exactly does one fix the shower that has been leaking? Get started right now by downloading this detailed how-to guide .
To quickly summarize, though, the first step involves removing any caulk or silicone that is already there. After that, chlorine should be used to clean your shower, as well as the area should be completely rinsed. Following that, you need to evaluate the state that your tiles are in. If you are aware of the state of your tiling, you will be more equipped to decide what sort of repair work should be done to the shower.
If your grout is in good condition then that might be all you have to do but it’s also possible that you need to repair any missing grout. To do this purchase the closest match possible and let it dry for the time listed on the bag. If you need to do it in one day you can use the compatible caulk instead of grout.
On the other hand, if somehow the tiles have been in poor condition and particularly if they have been already loosened, you should take them up from the floor along with any adhesives that are already there and replace them. Following the tiling has been removed, check to see whether the surface still has a spongy appearance.
If this is the case, the surface could have possibly been harmed by water. Therefore, it may need a more comprehensive repair than originally anticipated. In most cases, however, it is possible to dry out quickly and simply use a heater; once the moisture has been removed, you can then proceed to start replacing the tiles.
After the grouting has completely dried according to the instructions on the container, you may now physically dry the shower out in order to eliminate any extra water that has accumulated. You are able to accomplish this by placing a heater inside of the leaky shower and then allowing it to remain there through the night.
Nonetheless, you should make sure that electrical conduits are placed in a location that is separate from the heat in order to avoid overheating and starting a fire. As soon as dawn arrives, switch off the heat and allow the area to return to its normal temperature.
Remedial Membranes’ SMX Caulk is required to be applied as it is compatible with the Clear Waterproofing Membrane because it has been an all-purpose adhesive that also demonstrates excellent performance when used as an adhesive. SMX Caulk has a neutral finish and can be immediately covered with the Clear Waterproofing Membrane no cure time is required.
First, install the caulk onto the connections where the wall and wall intersect as well as where the floor intersects with the wall and remove the waste grate and install caulk to join the bottom of the waste grate to the puddle flange. Caulk/sealant or joint adhesive should be used in all of these locations. After that, you are able to proceed with the installation of the Clear Waterproofing Membrane atop the tiles.
Our Clear Waterproofing Membrane liquid membranes Parts 1 and 2 should then be thoroughly combined by hand. The next step is to install this same membrane along the wall tiles, beginning at the grout seams of the top of the bottom row of tiles and ending at the waste drain.
You possess the option of selecting the sort of tile surfaces that you would like the shower to feature before you put the finishing touches on the application. And besides, our Clear Waterproofing Membrane is capable of producing at minimum several different finishes, including gloss, matte, as well as satin.
You may get a glossy finish by combining our Clear Waterproofing Membrane Solution’s Part 1 & Part 2 using the same manner as you did for the initial coat. You must also incorporate the material into the area in order to ensure that it would be resistant to slipping despite the glossy appearance.
The matte effect may be achieved by combining Part 1 plus 5% matting solution and then applying it to the tiles. To get a satin effect, you have to follow virtually the same steps as for the matte finish; but, the amount of matting material you use should be reduced to 2.5%.
After you have applied two coats of the Clear Waterproofing Membrane, you have the option of allowing it to dry naturally or returning the heater to its surface in order to hasten the process after each coating. After having all of those operations completed, the shower, which had been leaking, is now waterproof, and it ought to no longer reveal any sign that it is leaking.
How Much Money Will You Spend When Repairing The Leak Traditionally?
In the event that the shower springs a leak and there are zero equivalent tiles available for the repairs (or if the owner has saved any), then the bathroom could need to be completely redone. Nevertheless, the typical cost of these comprehensive upgrades is between $20,000 and $30,000.
If it doesn’t work within your budget, then the strategies most homeowners provide are not going to be beneficial to you. Admittedly, they frequently recommend tearing off the tiles inside the bathroom as well as the shower, as well as the waterproofing coating as well as whatever they have behind it.
In most cases, this leads to a disaster, with the end product appearing much worse than before since it seems as if they merely patched throughout the tiles. Because of how it looks, you will be constantly reminded of the reality that the shower has in the past leaked.
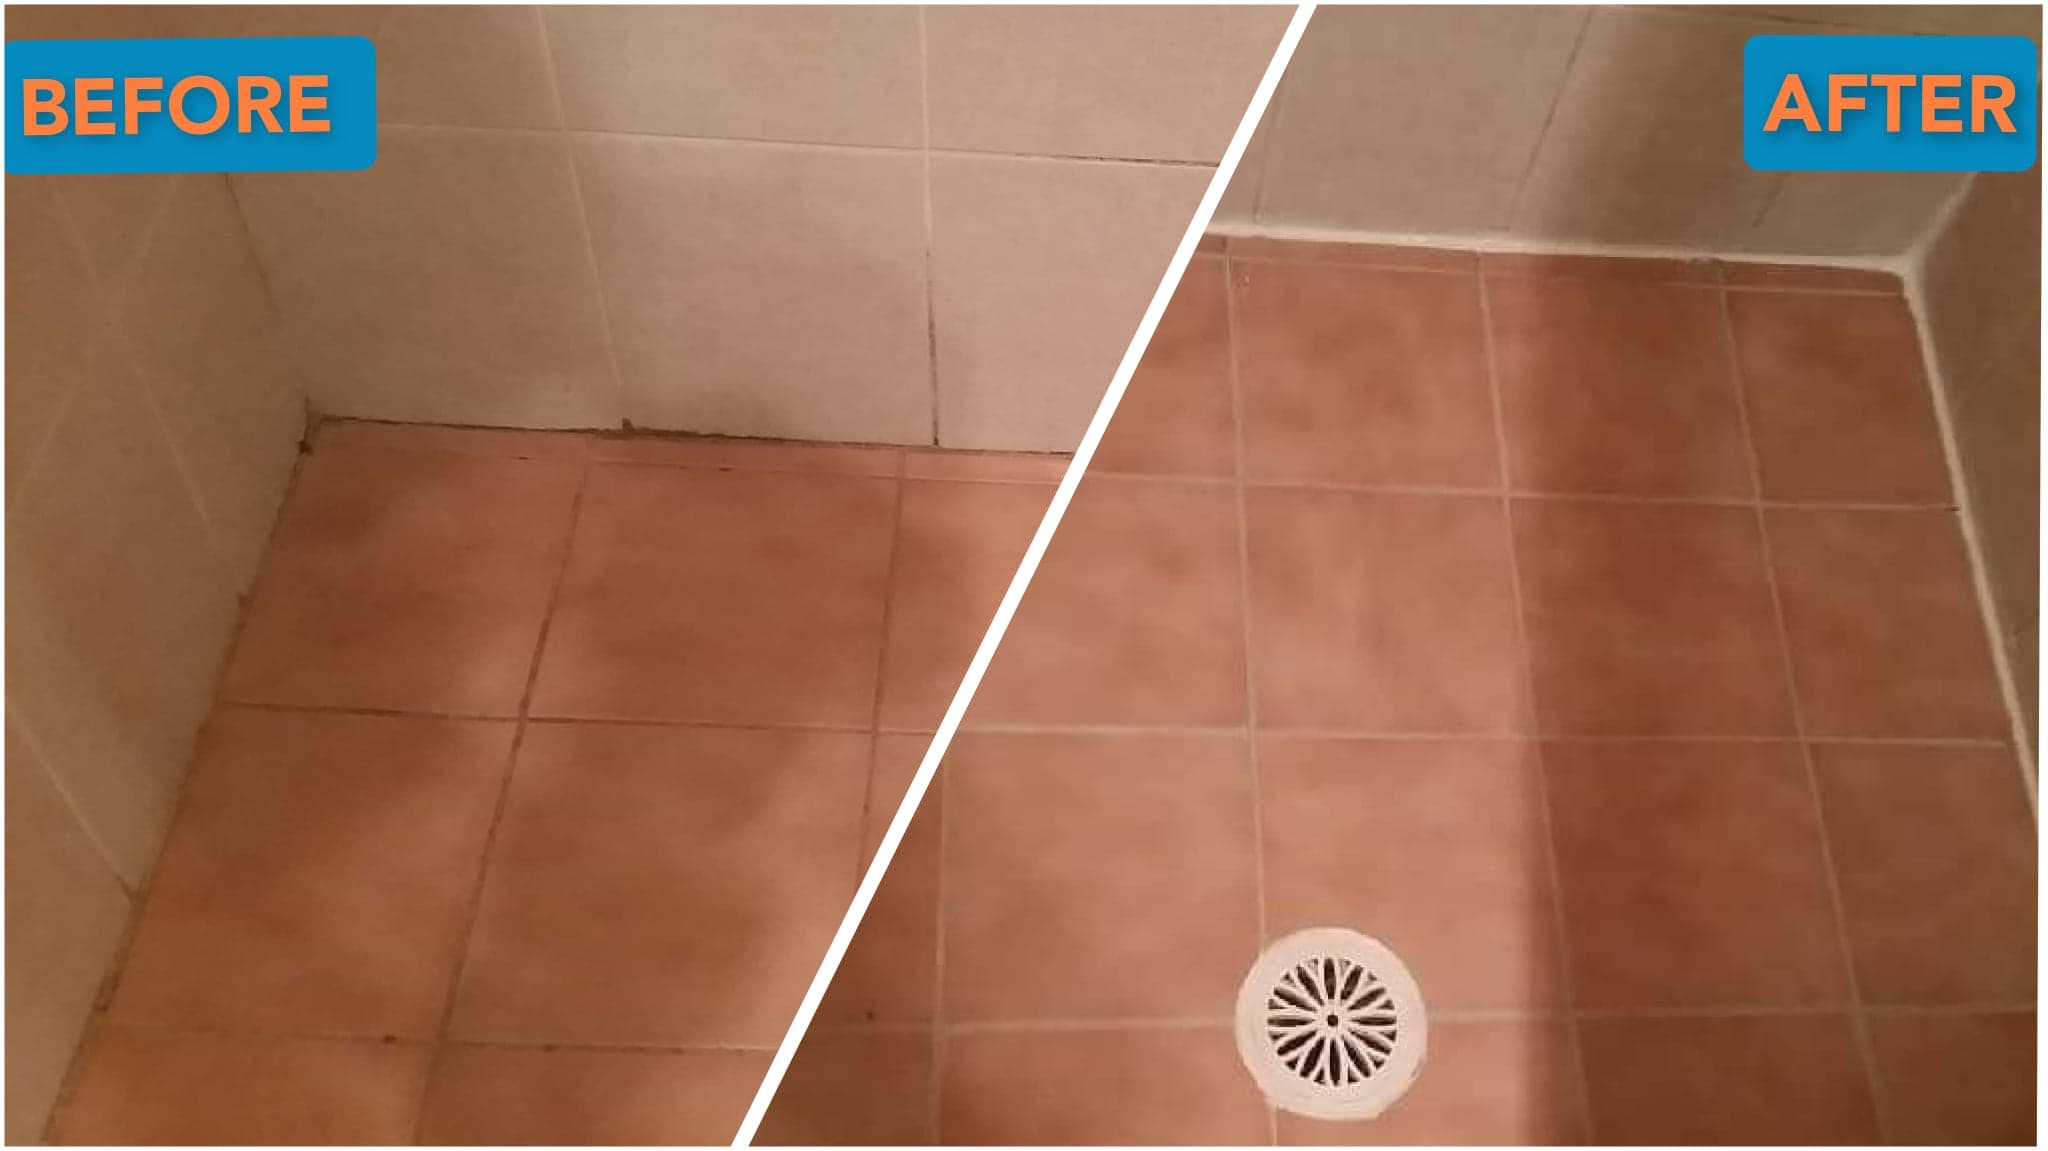
To your relief, however, such leaks within that shower may be readily fixed by placing Remedial Membranes Clear Waterproofing Membrane across the tiles inside the shower. The purchase of this device, which only costs $159+Shipping and GST can provide you with a solution to the leaks that will last as long as a liquid applied waterproofing membrane installed below the tiles except because its installed on top it can simply be patch repaired in an issues is created rather than needing to remove the tiles ever again.
Your leaking shower may be fixed by you with the help of such an effective clear waterproofing membrane, and you won’t even have to alter its look in the process. Additionally, it just takes one day to repair the leak if you use it.
It is for this reason that putting down a Clear Waterproofing Membrane on top of your tiles will end up saving you a large amount of money.
This Is How Remedial Waterproofing Can Help
The Clear Waterproofing Membrane would be a helpful waterproofing layer made of an effective material, which is called aliphatic polyurethane, that comes in two parts. Aliphatic is a term that describes the membrane’s ability to withstand being subjected to the elements and to be walked on without suffering a reduction in its level of performance. In addition, polyurethane is still regarded as one of the most effective waterproofing materials available on a global scale.
This Clear Waterproofing Membrane gets installed over tiles, but other polyurethane materials must have it adhered directly to the substrate.
That indicates the only thing left to do is seal the spaces that exist among the tiles, and then it shall be completely set to be installed. In addition, you may choose from three distinct finishes for your membrane from our selection: gloss, satin, or matte.
In addition, the naming of our waterproofing membrane gives away the fact that it is transparent. Because of this, you may use it on the tile in the shower without affecting the look of the tile from inside the shower to outside the shower.
It is possible to coordinate the Clear Waterproofing Membrane finish to the same finish already present on your tiling, and also the membrane may be terminated at a grout joint. It will be more difficult to determine where the beginning and finish of the application are.
But although we don’t promise that our Clear Over-Tile Waterproofing Membrane is totally invisible, it’s going to be difficult to spot and identify it from bare tiling if you don’t know how it’s applied. This is because this membrane is applied over tiles.
In conclusion, the waterproofing membrane is equipped with aggregates that prevent the surface from becoming slippery. Because of this, anybody in your household, from infants to senior citizens, may use the shower without risk of injury, despite the fact that the flooring may be wet. This is because they would not easily slide or slip on the surface of the shower.
The unpleasant and time-consuming process of fixing the leak in the shower has been greatly simplified in recent years. It can be fixed within the day with the transparent waterproofing membrane that is placed over the tiles, and you can easily do it by yourself.